1. Turn the car off and remove the key.
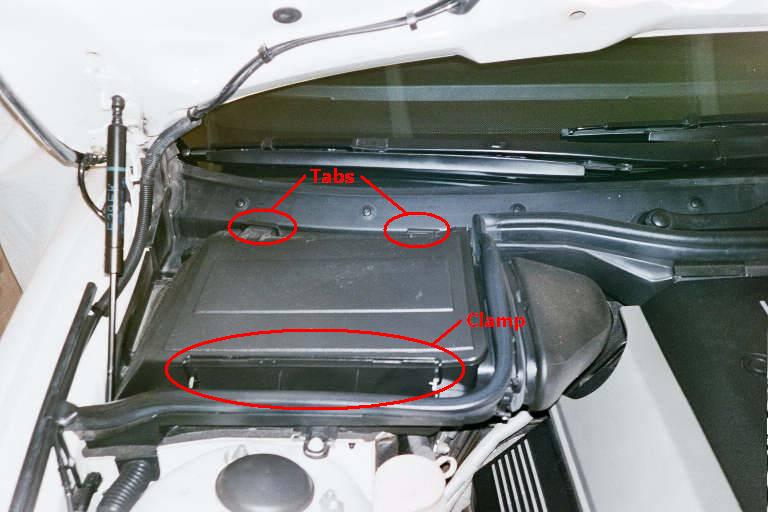
2. The ECU is located in the engine compartment, underneath the passenger-side microfilter housing (cabin air duct intake). Open the hood and examine the area.
3. Move the clamp forward and remove the housing cover by lifting up and pulling forward to clear the two tabs at the rear of the unit.
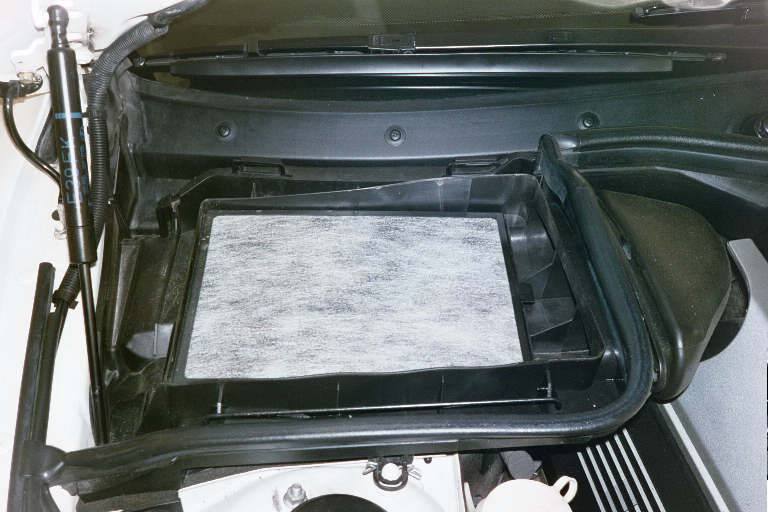
4. A picture of the microfilter.
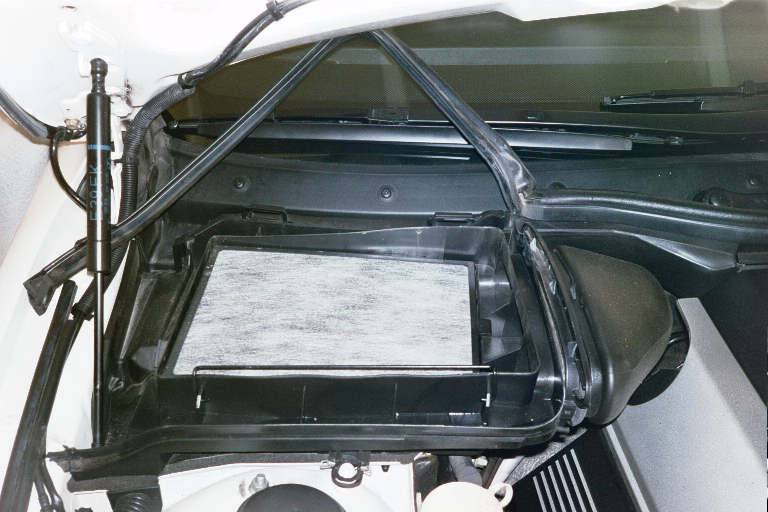
5. Lift the weather-stripping off the microfilter housing.
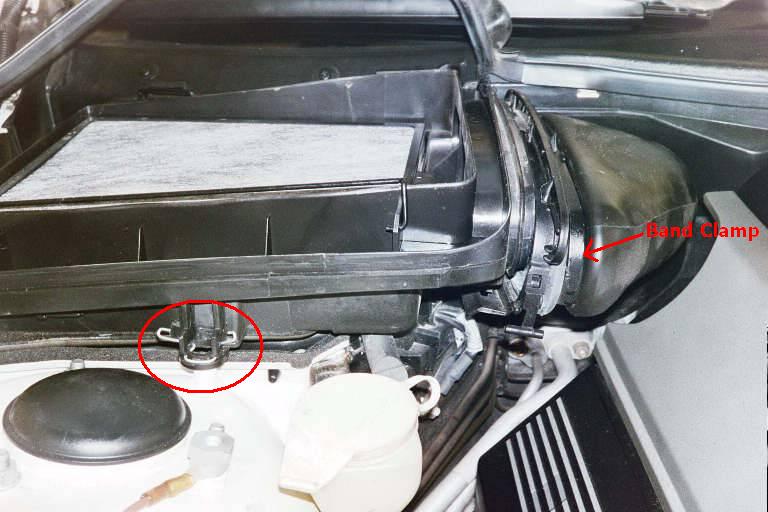
6. Carefully unclip the band clamp leading to the air duct. '98 and up E39s may have a different style clamp, but removing it should be just as easy. Press the edges of the front clip to release the housing from the threaded bolt and lift the microfilter housing straight up and out.
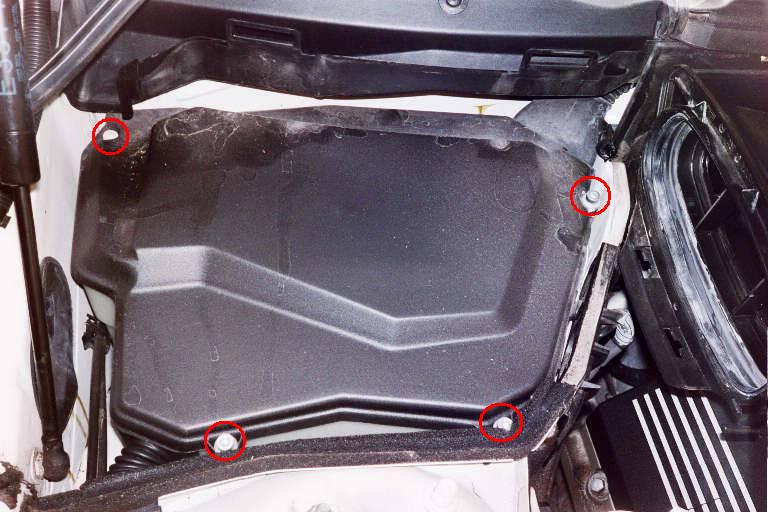
7. Remove the (4) 5mm hex bolts and lift off the ECU compartment cover. Be careful not to let a bolt drop down the side. Don't ask me how I know...
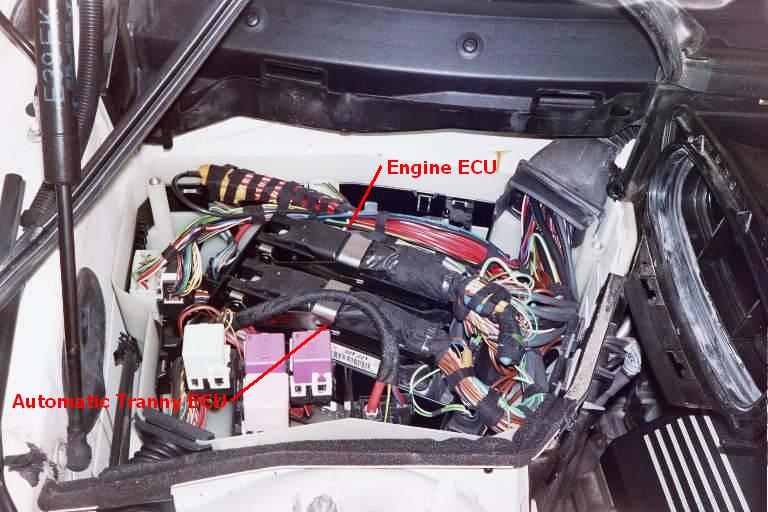
8. A picture of the ECU compartment. This is for a '97 540iA, so you'll notice two computers with black wiring harnesses. One is for the automatic transmission and the other is the engine ECU.
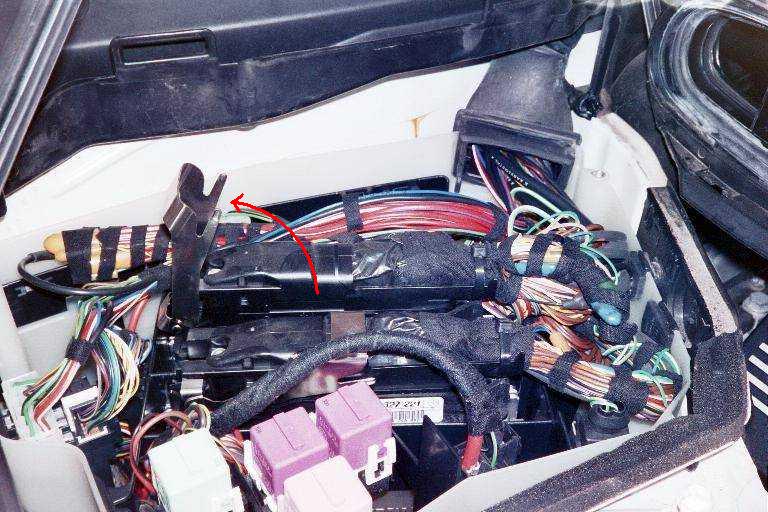
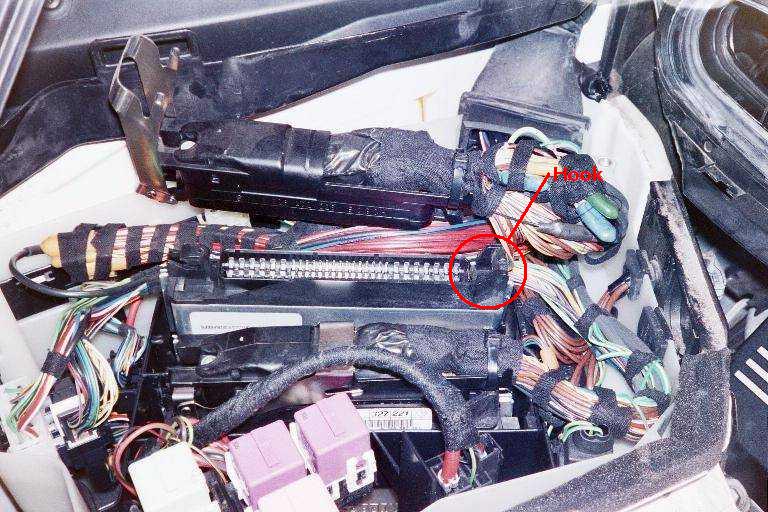
9. Locate the correct ECU and remove the wiring harness by unclipping and lifting the metal release arm. The harness has a hook on the right side that needs to be maneuvered out of as well. I heard from a '98 540i/6 owner that their ECU had some individual wiring harnesses plugged directly into the top of the ECU, instead of the release arm type. The harnesses were difficult to unplug, but the owner was able to do it with a little force. If in doubt, have a qualified mechanic perform these steps.
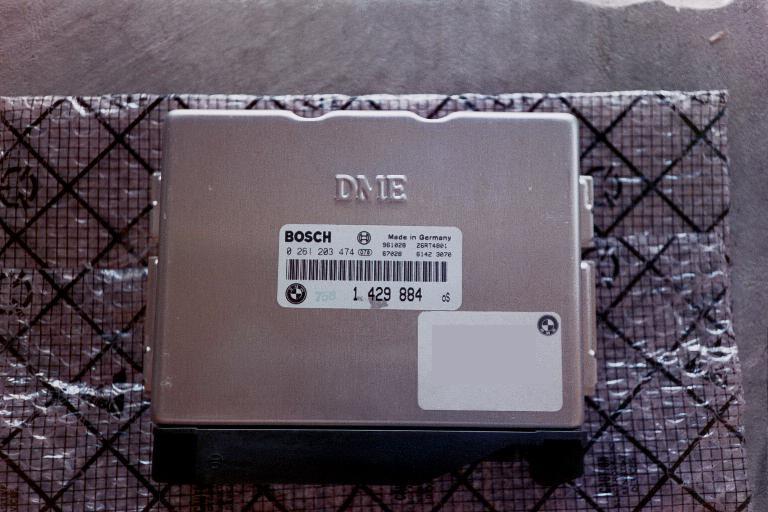
10. Pull the ECU straight up and out. If it's similar to a '97, there should be the word "DME" stamped on the front. Mine also had my VIN number (censored) printed on the bottom right sticker. Protect the ECU from static electricity at all times.
No comments:
Post a Comment